Ever wondered if you could significantly boost your signal strength without breaking the bank? Building your own yagi antenna is not only possible but can also be a rewarding project offering superior performance compared to many store-bought options.
Delving into the world of DIY antennas opens up a realm of possibilities, especially when dealing with specific frequency needs or aiming for enhanced directional reception. While commercial antennas offer convenience, the ability to customize and optimize an antenna for a particular application can provide unparalleled results. This article explores the intricacies of crafting a yagi antenna, covering design principles, construction techniques, and the advantages it offers. For those venturing into the realm of long-range communication, particularly with technologies like Lora, understanding how to build and fine-tune a yagi antenna is an invaluable skill.
| Category | Information |
|---|---|
| Antenna Type | Yagi-Uda Antenna |
| Key Features | Directional, high gain |
| Typical Applications | Television reception, amateur radio, long-range communication (e.g., LoRa) |
| Components | Reflector, driven element (dipole), directors |
| DIY Difficulty | Moderate (requires careful measurement and construction) |
| Materials Needed | Conductive rods (e.g., brass welding rods), boom (wood or PVC), coaxial cable, connectors |
| Frequency Range | Varies depending on design; can be optimized for UHF, VHF, or specific frequencies (e.g., 1.3 GHz) |
| Gain | Typically 6 dB to 20 dB, depending on the number of directors and boom length |
| Polarization | Linear (horizontal or vertical), depending on the orientation of the elements |
| Design Software | MMANA-GAL, Yagi Optimizer, online calculators |
| Additional Resources | American Radio Relay League (ARRL) |
The journey into antenna construction begins with understanding the fundamental principles behind the yagi antenna. At its core, a yagi antenna is a directional antenna consisting of multiple elements: a reflector, a driven element (typically a dipole), and one or more directors. These elements are precisely arranged on a boom to achieve optimal signal gain and directionality. The reflector, positioned behind the driven element, reflects radio waves towards the driven element, while the directors, located in front, focus the signal in a specific direction.
- Chad Kroeger News Backlash Nickelbacks Wild Journey
- Gorr The God Butcher Comics Vs Mcu Explained Powers Guide
Optimizing a yagi antenna often involves careful consideration of various factors, including the frequency of operation, the desired gain, and the physical dimensions of the antenna. In the realm of UHF (Ultra High Frequency) applications, optimization becomes particularly crucial. There is another reason for optimizing the uhf. The uhf yagi has more elements, so it has a narrower beam than the vhf yagi.
The design of a yagi antenna is a delicate balancing act. Build a yagi antenna size needs to be determined from the antenna performance indicators in the compromise consideration. Each element plays a critical role in shaping the antenna's radiation pattern and overall performance.
When embarking on a DIY yagi antenna project, careful attention to measurements is paramount. Precise dimensions are essential for achieving the desired performance characteristics. Consider the following measurements for a specific yagi antenna design: The length of the antenna reflector is 35 cm (0.5, wavelength =70cm), the length of the three leaders is equal, all 31 cm (0.44), the length of the active element is 34 cm (0.486), and the actual length should be.
- Skymovieshd Is It Safe Streaming Alternatives You Need Now
- Aswad Ayinde The Horrifying Crimes Of A Music Video Director
To aid in the construction process, consider utilizing a scaled yagi antenna template. Print out the scaled yagi antenna template (download from next step). i used a yagi modeler java applet to generate the diagram. This template provides a visual guide for accurately positioning and aligning the antenna elements.
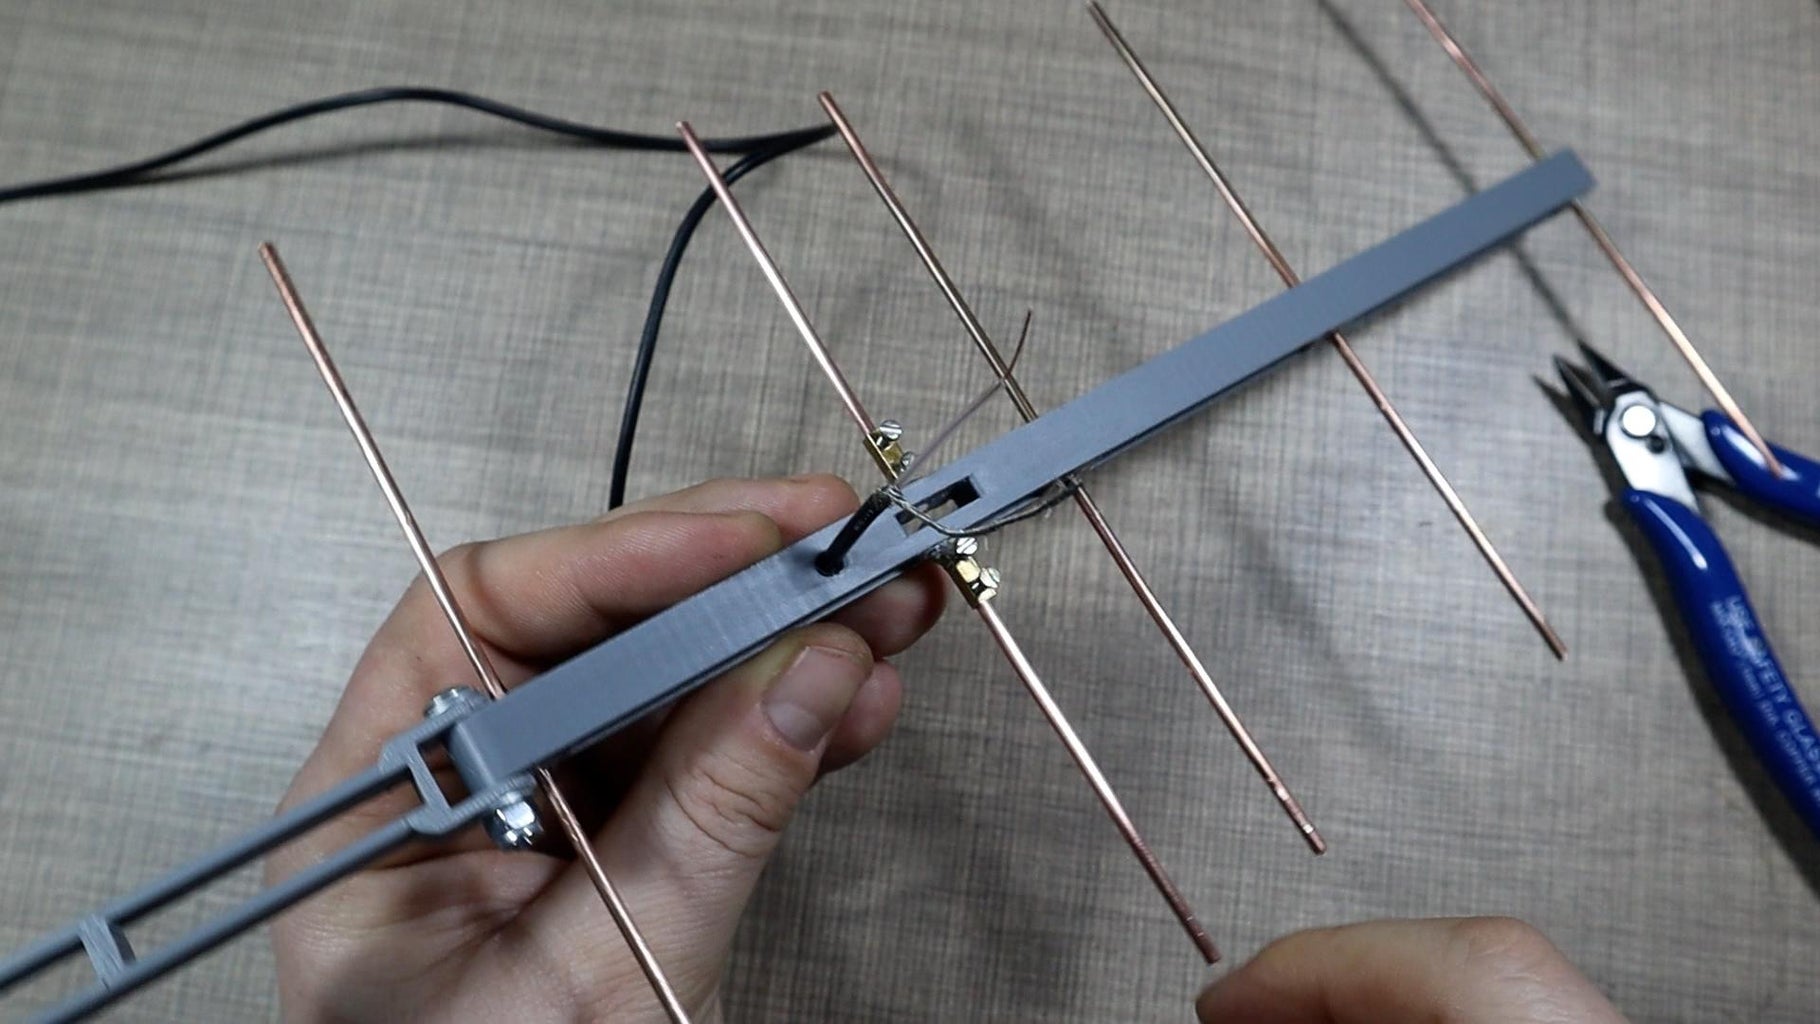
With the template in hand, the next step involves preparing the antenna elements. For smaller DIY projects, common materials like paper clips can be utilized. Trim paper clips to size and glue them to the template. For more robust constructions, brass welding rods are often preferred due to their conductivity and durability.
The antenna's backbone, or boom, provides structural support for the elements. Use popsicle sticks to build the antenna's backbone and hold it together. Alternatively, materials like PVC pipes or wooden boards can be used, depending on the desired size and strength of the antenna.
Once the antenna is assembled, connecting it to a device requires careful attention to impedance matching. Antenna and feed cable connection is the first to solve the impedance matching problem. This ensures efficient transfer of radio frequency (RF) energy between the antenna and the connected device.
For specific applications like Lora, a yagi antenna can significantly extend the communication range. Diy yagi antenna for lora: In a previous video, i tested a module with omnidirectional antenna that reached up to 20 kilomete This enhanced range is particularly useful in scenarios where long-distance communication is essential.
The yagi antenna design is a four element design, with one reflector, two directors and one driven dipole element. This configuration provides a good balance of gain and directionality for various applications. The physical construction consists of a piece of wood for the boom, brass welding rods for the elements, and a terminal block for the active dipole element.
So by request i am finally writing a diy yagi antenna tutorial. In this tutorial i will discuss a little bit of theory behind the yagi and then go into the design and construction. For this tutorial, i built 3 yagis for 1.3 ghz since it is quite difficult to find a 1.3 ghz yagi off the shelf and 1.3 ghz seems to be gaining popularity.
Diy yagi antenna for lora: In a previous video, i tested a module with omnidirectional antenna that reached up to 20 kilometeThis demonstrates the effectiveness of using a yagi antenna to improve signal range.
While yagi antennas are known for their directional capabilities, dipole antennas offer a more basic and fundamental approach to antenna design. The dipole antenna is the most basic and fundamental antenna design. It consists of two conductive elements, typically wires or rods, of equal length, connected to the coaxial cable at the center.
For those seeking to boost FM radio reception, a simple DIY FM dipole antenna can be a cost-effective solution. This way, you can make an easy fm radio antenna that boosts your reception. The diy fm dipole antenna is about 150 cm long. Its a reliable choice that beats many other simple options.
When building any antenna, creativity and experimentation are encouraged. This article encourages you to be creative. Try different materials, places, and antenna types. Good reception is key, whether youre in the city or the.
Understanding antenna polarization is crucial for optimizing signal reception. Read up on antenna polarization. Basically, the rf is being emitted in a preferred orientation. For your yagi, the polarization follows the orientation of the elements. If your antenna and boom are positioned so that the elements are parallel to the ground, the rf will be horizontally polarized.
Software tools can greatly assist in the design and optimization of yagi antennas. This is the software perite used to design the 'perite 850 and 900 yagis' here is a guide by the mnana master, audionut, to help you get more out of mmana design and tweaking. These tools allow you to simulate antenna performance and fine-tune the design for specific requirements.
The gain of the antenna is about 6 db, increases with increasing boom length and the number of directors, and reaches a maximum of about 20 db. The resistance depends on the distance between the elements and on the ratio between the length and diameter of the material used. Understanding these factors is essential for maximizing antenna performance.
The structure of a yagi antenna. How do you build a yagi antenna? These are common questions for those new to antenna construction.
When considering whether to build or buy an antenna, various factors come into play. I still don't understand the buy vs. Yes, one could probably design something for your specific need that improves on what is available commercially. But probably not for the same money. One can buy a decent but not great attic antenna and amplifier for about $65.
Proper positioning and setup are essential for maximizing antenna performance. Positioning and hooking up your mad max antenna. The best possible setup for your antenna would be as high as possible inside your home, while still being a short distance from your tv. Failing that, youll need to work out some compromises. The best bet for reception is higher in your house, because the signals this antenna is catching are.
Over on his youtube channel dereksgc has uploaded the next video in his series on satellite reception. This highlights the ongoing interest and development in antenna technology.
The design and operation of a yagi antenna. At its core, a yagi antenna consists of multiple elements arranged on a boom. These include the driven element, reflector, and one or more directors. The driven element, usually a dipole, is the heart of the antenna, where the transmission and reception of radio waves occur.
The next step in building your mobile radio antenna is designing the antenna itself. The design will depend on the frequency range you want to operate in and the type of radio system you have. You can choose to build a simple dipole antenna, a vertical antenna, a yagi antenna, or a loop antenna, among others. Each type of antenna has its unique.
So by request i am finally writing a diy yagi antenna tutorial. In this tutorial i will discuss a little bit of theory behind the yagi and then go into the design and construction. For this tutorial, i built 3 yagis for 1.3 ghz since it is quite difficult to find a 1.3 ghz yagi off the shelf and 1.3 ghz seems to be gaining popularity.
In today's world, staying connected is more important than ever. If you want to focus your reception on specific targets or want increased signal gain, a directional yagi antenna is a viable option. This type of antenna consists of a driven element, reflector, and multiple directors, allowing for precise reception in a specific direction.
How it came to be credited solely to dr. Yagi is a tale of some treachery on yagis part with a dash of naivet on udas. Uda published the first japanese language papers on the antenna. This sheds light on the history and development of the yagi antenna.
My one book dealing with antenna's mentions circular polarisation, and has a design for a freestanding vertical end fed half wave antenna, its the most ergonomic indoor design i've seen. (basically a base with two 1/2 round vertical sections, one 7.5ft long the other 2.5ft long) what antenna are you using at the moment ?
The yagi antenna has a bandwidth that is much less than a bowtie antenna, because the yagi is a high q antenna as compared to the bowtie antenna which has a low q, as defined by the max allowable swr over the required bandwidth. The bowtie antenna is a member of the collinear array family, which you will read about in the arrl antenna book.
The yagi antenna is one of the most powerful diy antennas. Its a bit more complicated to build than the others, but its still relatively easy. Youll need pvc pipes, wire mesh, a wooden board, screws, and a coaxial cable. Cut the pvc pipes to size and assemble them according to the yagi antenna plans.
- Eric Villency Bio Net Worth Kimberly Guilfoyle More
- Your Guide Watch Movies Online Hindi English More